How to Build a Treehouse: A Step-by-Step Guide
Dreaming of a Treehouse? Here's How to Build One
Building a treehouse is a fun and rewarding project. It can be a play space, a quiet retreat, or even a luxury getaway. A well-built treehouse blends into nature and offers a special place to relax and enjoy the outdoors. This guide will walk you through how to build a treehouse, from choosing the right tree to finishing the final details. I have shared our personal story of building our treehouse bed and breakfast, Enchanted Forest Treehouse. We learned so much! The treehouse builders that came before us outlined a path and established the groundwork for permitts and engineering that served as our foundation. I can’t thank them enough for their knowledge and guidence!
Inspiration and Research


I, along with many other people was inspired by the HGTV show, Treehouse Masters. I purchased books written by Pete Nelson and began my journey with two years of research. I visited several treehouses and learned from the experiences of each location. Mostly, I saw the results of the choices the owners had made and knew what NOT to do! The "Sources" section in the back of these books gave me a list of people to contact and interview to see which ones fit my needs. I learned so much interviewing engineers, builders, and discovered the uniqueness of treehouse construction. I hired Charles Greenwood P.E. as our engineer which started a new friendship as he taught and worked along our side to create our luxury treehouse retreat. The most important lesson by far was respecting the trees! They are a living organism. They must be protected and respected or the foundation of the build will be in vain! I also hired Craig Small to be our arborist. He still takes care of our trees and has them on a every 6 month health maintenance schedule. It takes a lot of planning and getting contractors to "think outside of the box". Each trade must be able and willing to work outside of their normal skill set! Pick your subcontractors carefully and develop your relationships. Mistakes will cost you in the health of your trees, thus the longevity of your treehouse. Let's begin! On Thu, Jul 6, 2023 at 7:28 AM marsha <marsha@enchantedforesttreehouse.com> wrote:Thank you for publishing your books!!! Be in A Treehouse, has served as an inspiration and a textbook for learning! I read and studied your book prior to researching who, how, and when we were going to build ours. I ended up with Charlie Greenwood. Over the last 4 years we designed the Enchanted Forest Treehouse in Union, Mo. I know you have been all over the world and seen amazing treehouses, but I feel we are unique and I'd like to invite you to visit our website. enchantedforesttreehouse.com or see pictures on Instagram and Facebook and u-tube.If at all possible I'd love for you to come and stay...but at the minimum I just wanted you to know how much you, your show, and your books have changed our world for the better! Feel free to reach out to plan a visit or just talk.Thank you so much!Dear Marsha,Thank you for sharing your wonderful photos of the Enchanted Forest Treehouse! It's truly heartening to hear how "Be in A Treehouse" helped inspire your own treehouse journey. Your collaboration with Charlie Greenwood has resulted in something truly special. The attention to detail and craftsmanship that went into creating your treehouse in Union, Missouri is evident. We're honored that our publications played a role in bringing your vision to life. Your generous invitation is much appreciated. While travel schedules can be complex to coordinate, we're delighted to learn about unique treehouse projects like yours that contribute to the growing community of treehouse enthusiasts. Thank you for taking the time to share your story with us. It's wonderful to see how treehouse construction continues to bring joy and inspiration to people around the world.Best regards, The NT&S TeamNelson Treehouse and Supply, PO Box 1135 , Fall City, WA 98024w | www.nelsontreehouse.com / e | info@nelsontreehouseandsupply.com1. Choosing the Right Tree
What kind of tree is best for a treehouse?
The trees are the most important part of your treehouse! They will determine the structure you can build. Choosing the right one will make your foundation stronger and give it better longevity. Here’s what to look for:
Ideal Trees: Apple, Beech, Cedar, Chestnut, Douglas Fir, Maple,Oak, Redwood, Spruce, Sycamore are strong trees. Areas with diseased tree types are to be avoided.
Acceptable Trees: Avacado, basswood, Bay, Cherry, Ginko,Hackberry, Hickory, Hemlock,, Hornbeam, Ironwood, Locust, Lime, Madrone, Magnolia, Mulberry, Olive, Orange, Persimmon, Pine, Poplar,Sassafras, Sweet gum, Walnut, Willow, and Yew
Bad Trees: Alder, Aspen, Box Elder, Cottonwood, Holly, Juniper, Palm, Swamp Oak are not suitable trees
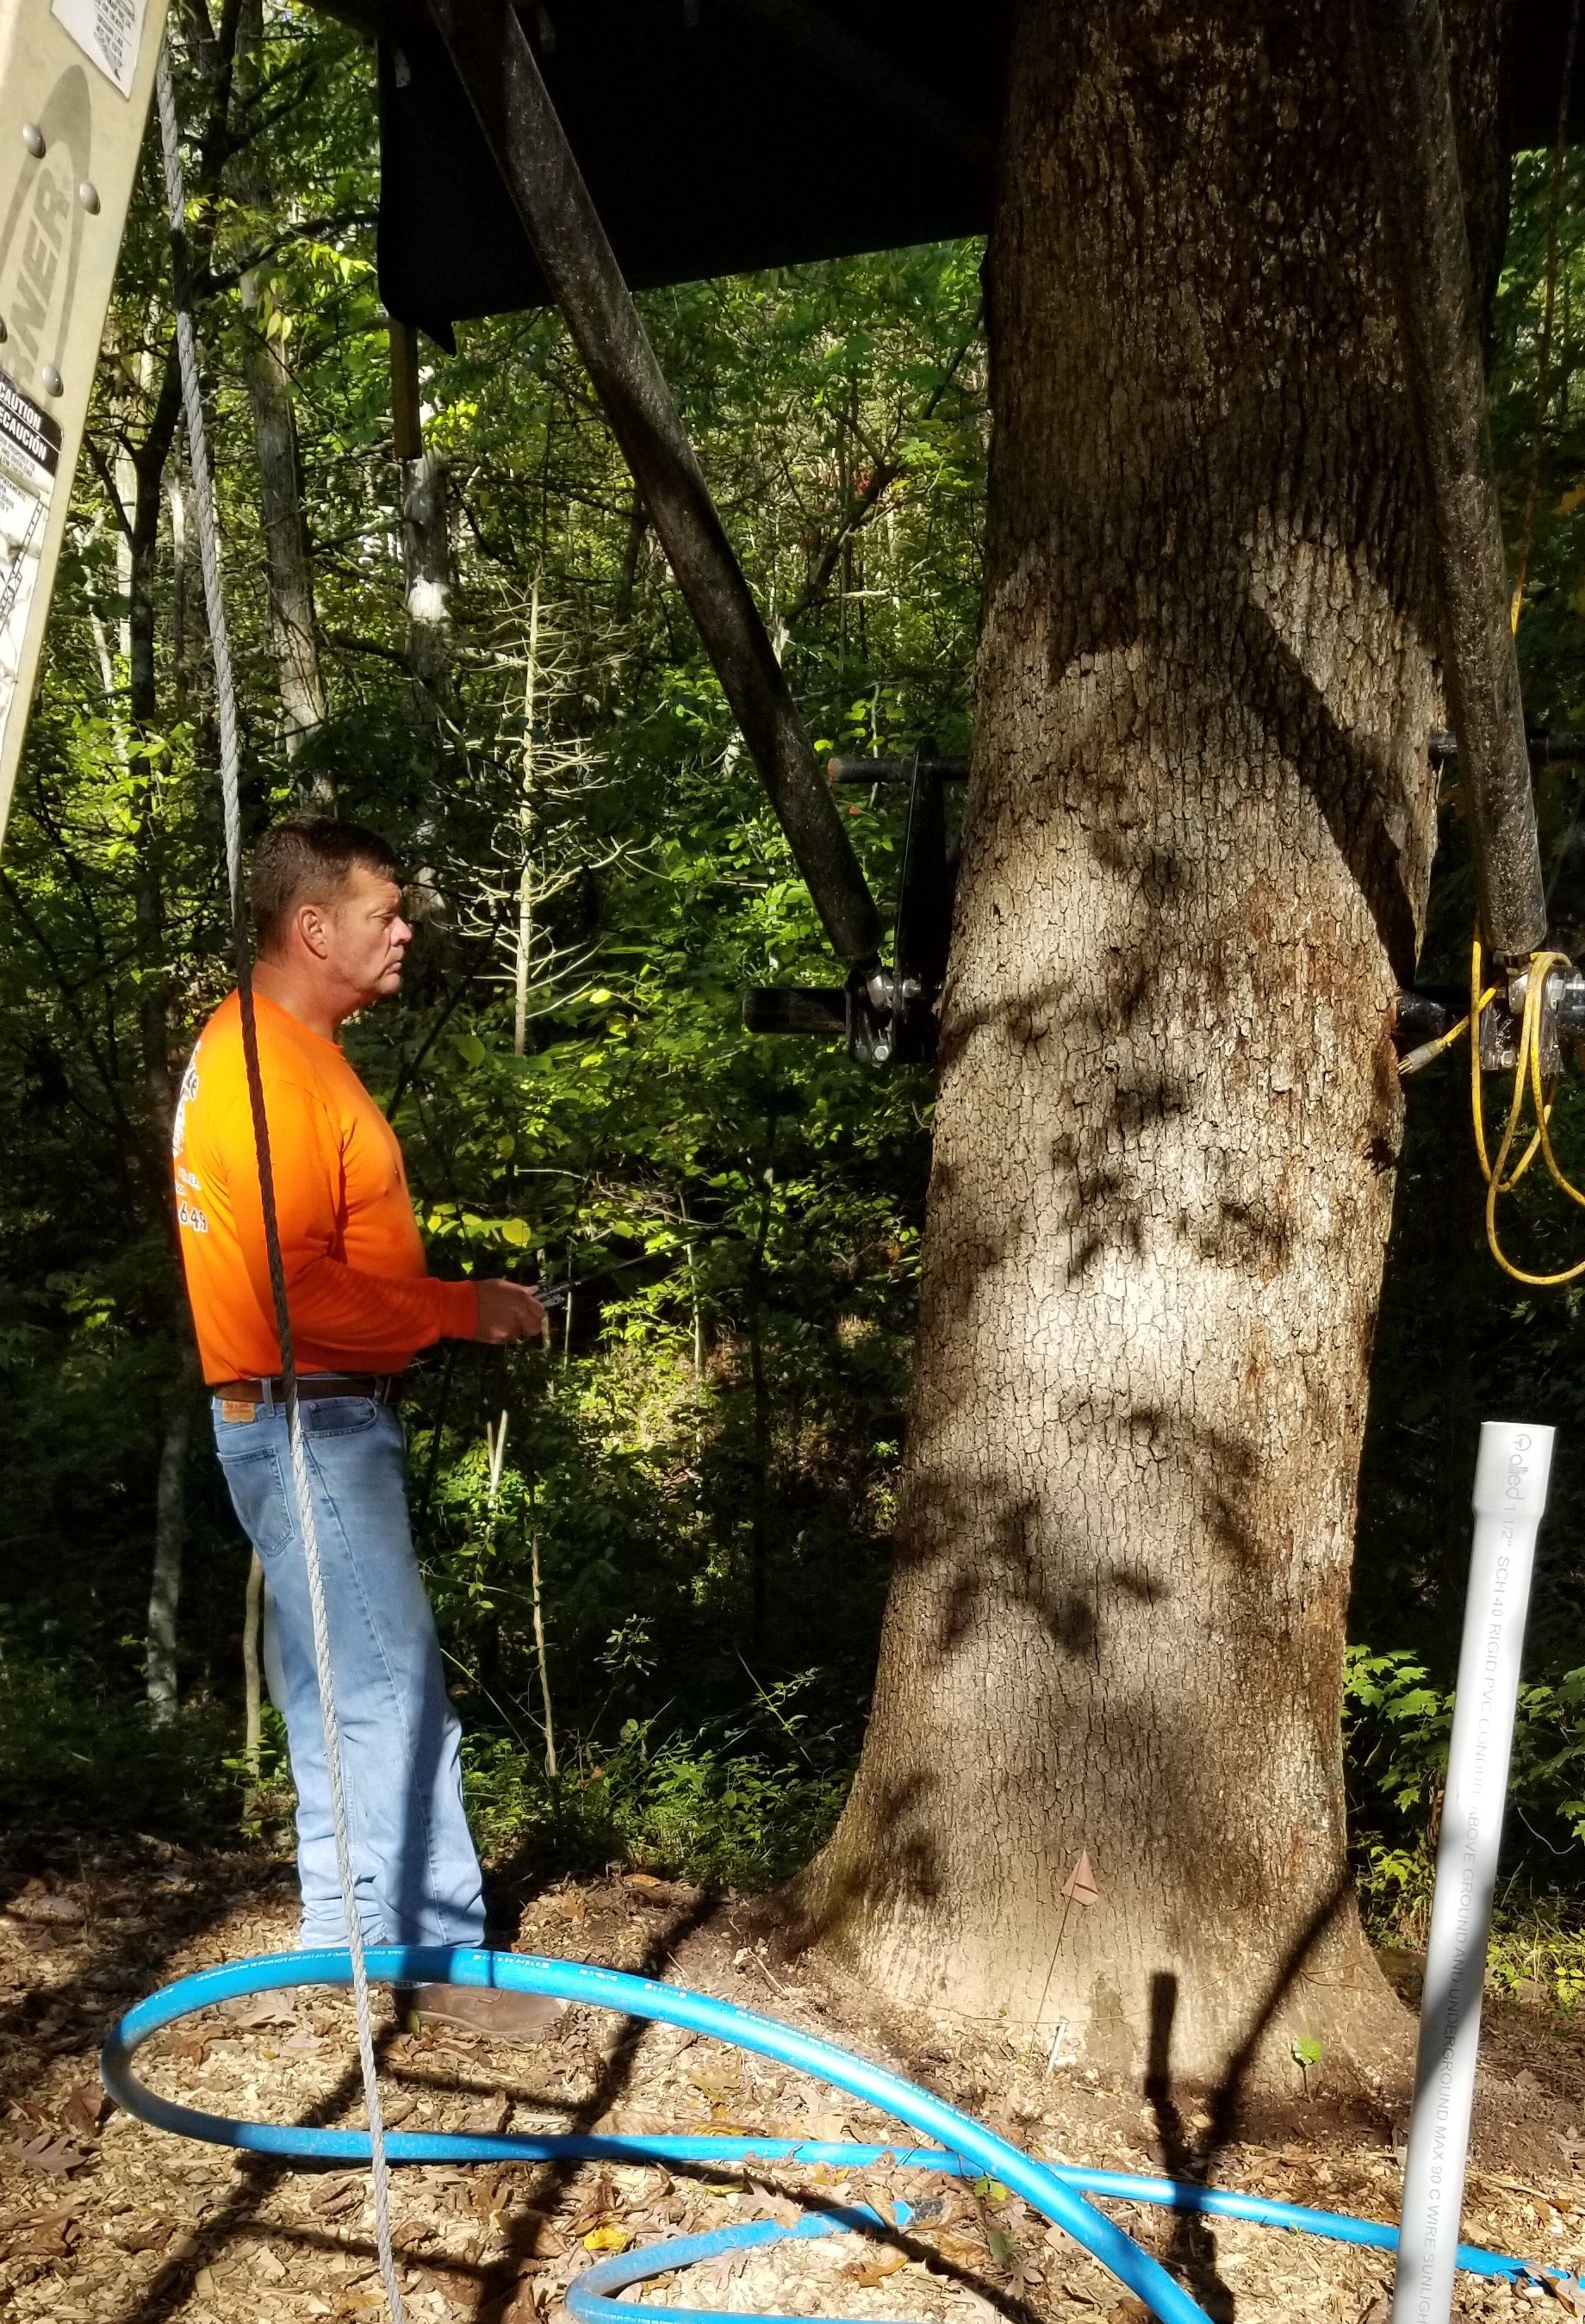
Healthy Structure: Pick a tree with a solid trunk, deep roots, and no signs of disease. Hiring a arborist is the only choice. He can inspect the trees for signs of stress, disease, and structural safety. Also advise you on how to keep your trees healthy throughout the build. There is a minimum trunk diameter, (>18 “) if you are planning on a single tree verses multiple trees( >10”) The trees can’t be more than 16 -18 feet apart.
Height: Your treehouse should be 6 to 20 feet above ground. Height from the ground will allow for movement of the trees while keeping the structure safe. Engineering is required for placement of shear walls and additional structural reinforcements. Our engineer, Charles Greenwood, had a program that simulated the movement of the trees and this information was invaluable!
Thick Branches: Deadwood should be removed as well as any branches that will interfere with the structure. Plan around large branches. The platform must allow for growth of the trees. Beams must be at least 3” from the tree bark, allow 6 - 9 “ from tree bark to joists, and the building should have a clearance of 9” from the trees. I strongly recommend you plan not to allow the trees to penetrate the roof! There are ways to minimize the water that gets in, but I choose to avoid that issue. Floor plans must consider where the branches come into play. Digital photography or scale drawings are required to plan around these concerns.
Room to Grow: Decking can be 1.5” from the tree trunk. Continued monitoring and trimming the deck back as the tree grows is necessary. Building codes also must be taken into consideration. You don’t want anyone’s feet to fall through!
Safe Location: Make sure the tree is not too close to other trees that could pose a risk in storms. Removing hazardous trees is necessary before the build. Lightening is always a safety risk. If you are not the tallest tree in the woods that is good! Grounding the building can be considered too. Consider build codes and a site map to make sure your structure doesn’t overhang on property lines! Establish a working relationship with the building permit office!! Make sure you follow their regulations. Most offices will not have any experience in this type of build and you will have to be prepared to educate them. The experience of a treehouse engineer will give the necessary background and have proof of what is needed to meet codes. Don’t fall into the trap of hiring a playground or local hardware store builder. They will cost you in the end! I saw several trehouses that have failed due to this error. Treehouse experts such as Michael Garnier( Out ‘n’ About Treesort) and Pete Nelson (Treehouse Point) speak to the legal permitting process and the grueling hard work they did to get this done. Since 1997, the Treehouse Conference, was established. It has allowed engineers all over the world to meet and share concept of design and construction and will serve you in guidance in your build.
We owned 6.5 acres of forested land with old growth trees. We hired Craig Small, arborist, and owner of Craig’s Tree Service. We started with selecting our trees. There were 2 locations that offered 2 large white oak trees to choose from. The cost of putting in a road and utilities chose the current location over the other option.
Keep your trees and the roots safe!!! Walking, using machinery, or equipment within the drip line of the trees is forbidden! This is Rule #1! Establish a perimeter and put up an orange fence line designating the restricted area. Boom trucks for lumber supplies, hydrovac techniques to tunnel for electric, plumbing and sewer lines must be used. No trucks, bobcats, or tractors can drive in the area. The root structure is @ a foot below ground and if damaged will kill your trees. A lot of supplies and tools will need to be carried and use of ladders is required. Parking areas can not be below the tree. Nor can that area be used for guest activities in the future. Protection is absolutely necessary.


2. Designing Your Treehouse
How do you design a treehouse? Always with growth and movement in mind! Your tree selection will determine the design and size of the platform and weight limits.
A good plan is necessary to make the building process flow smoothly. Consider these design tips:
Leave Space for the Tree: Trees are alive! they grow in girth and in height. For height they grow from the tips of the branches. how ever high you make the platform will never change, the girth of the tree trunk will continue to expand. Allow room around the trunk by placement of the beams, floor joists, and decking. Building codes specify the space an opening in the decking can be. . Ours had to be less than 1.5 inches. Plan to revise the opening every couple of years. With this in consideration, plan the placement of the floor joist underneath the decking. Cutting through a joist would compromise the integrity of the foundation. In addition the building must be no less than 9 inches from the tree bark to the walls. The wind plays a major role in movement and can damage your structure.
Rules of thumb: tree bark to beam - must be greater than 3 inches. tree bark to decking - 1.5 inches
tree bark to joists - 6 to 9 inches tree bark to walls - 9 inches
Use Strong Supports: There are multiple types and designs of tree hardware. Don’t buy hardware from the local hardware stores. They are not designed for use in LIVING TREES! Hardware is engineered for use in trees called TABS. This is short for Tree Bolt Attachments. They work along with the trees to create stronger attachments than either the tree or the steel can do alone. Trees, when weight is added to them grow stronger naturally. when the tree heals around the steel it form a calas, much like our own bones do. That tissue is denser and stronger than it’s original anatomy. Correct placement of the right type of hardware will make the tree grow stronger. In reverse, incorrect placement of the wrong hardware will damage or kill your tree!
Distribute the weight evenly: Multiple trunks add stability. TAB designs will allow for the amount of weight you want to support and an engineer can design a safe platform with TAB placement. As a general rule don’t extend the platform more than 8 feet from the center of a tree. The trees will decide the size of the platform. A tree Layout Plan can be done 2 ways. Scale drawings including ground elevations, tree diameters, placement of branches, distance between trees, and all plotted on a site map. Or digital photography can be taken and entered into a cad program. The building department will need it placed on a site map, along with utilities, for permits.
Protect Against Weather: It is hard to fight mother nature. If the tree trunk penetrates the roof it will let moisture in. Some designs are forgiving for this type of environment, others are not. Build around the tree to keep large branches or to avoid the tree from going through the roof. Use waterproof wood treatments on beams and joists and decking. Observe the need to bury water lines to avoid a freeze. as well septic lines. Foam insulation is preferable due to weight. Placement of heat tape with thermostats and pipe insulation will protect the service. Yearly snow loads can be predicted and must go into consideration of engineering. Keep deadwood removed. HVAC can be ducted or non ducted mini splits. Double frame exterior walls for proper waterline insulation, as well running water inside the treehouse helps to prevent freezing.
Let Air Flow In: Windows are a treehouses best friend! To see the surrounding branches and feel the presence of being up in a tree is the whole experience. Have opportunities to be outside on a treetop deck. Allow for the wind to blow and be as one with nature. The trees will comfort you in ways you can’t imagine. Note the Cardinal directions and use the sun to your advantage where planning.
Match the Surroundings: The building of the treehouse requires you to work with nature… not to violently strip the land, tear up the soil, dig and fill in with concrete, and deposit of waste everywhere! You have to protect the surrounding area at all costs or you will result in tree death and loss of the structure’s foundation. All too often in my travels researching treehouses in the surrounding states, I saw trees dying because of lack of knowledge by the builder. Utilities must be hydro-vaced, using pressurized water and suction to place underground utilities. trimming the tree roots for pipes instead of ripping them apart with an excavator. no traffic within the drip lines of the trees branches. Mulch placement for walking areas under the trees should be used. This prevents damage to the feeder root system. temporary platforms can be used during construction, Use orange mesh and stake out the drip lines. Make sure EVERYONE knows it is forbidden to enter without knowledge of the care of the roots! Do not place your drive or parking or picnic areas under the trees. Concrete poured within the drip line compresses the roots and changes the ph of the soil. It is best to avoid. Use pavers, mulch, or landscape to make walkways and control water runoff.
Power Options: The trees don’t make great hosts to solar unless you run it from a distance away. Gas comes with increased fire risks. Electric is the safest. Hydro-vac utility lines as the building codes specify. Use certified electricians for safety and inspection reasons. Lighting can make a world of difference in the woods. This is where I would splurge if possible.


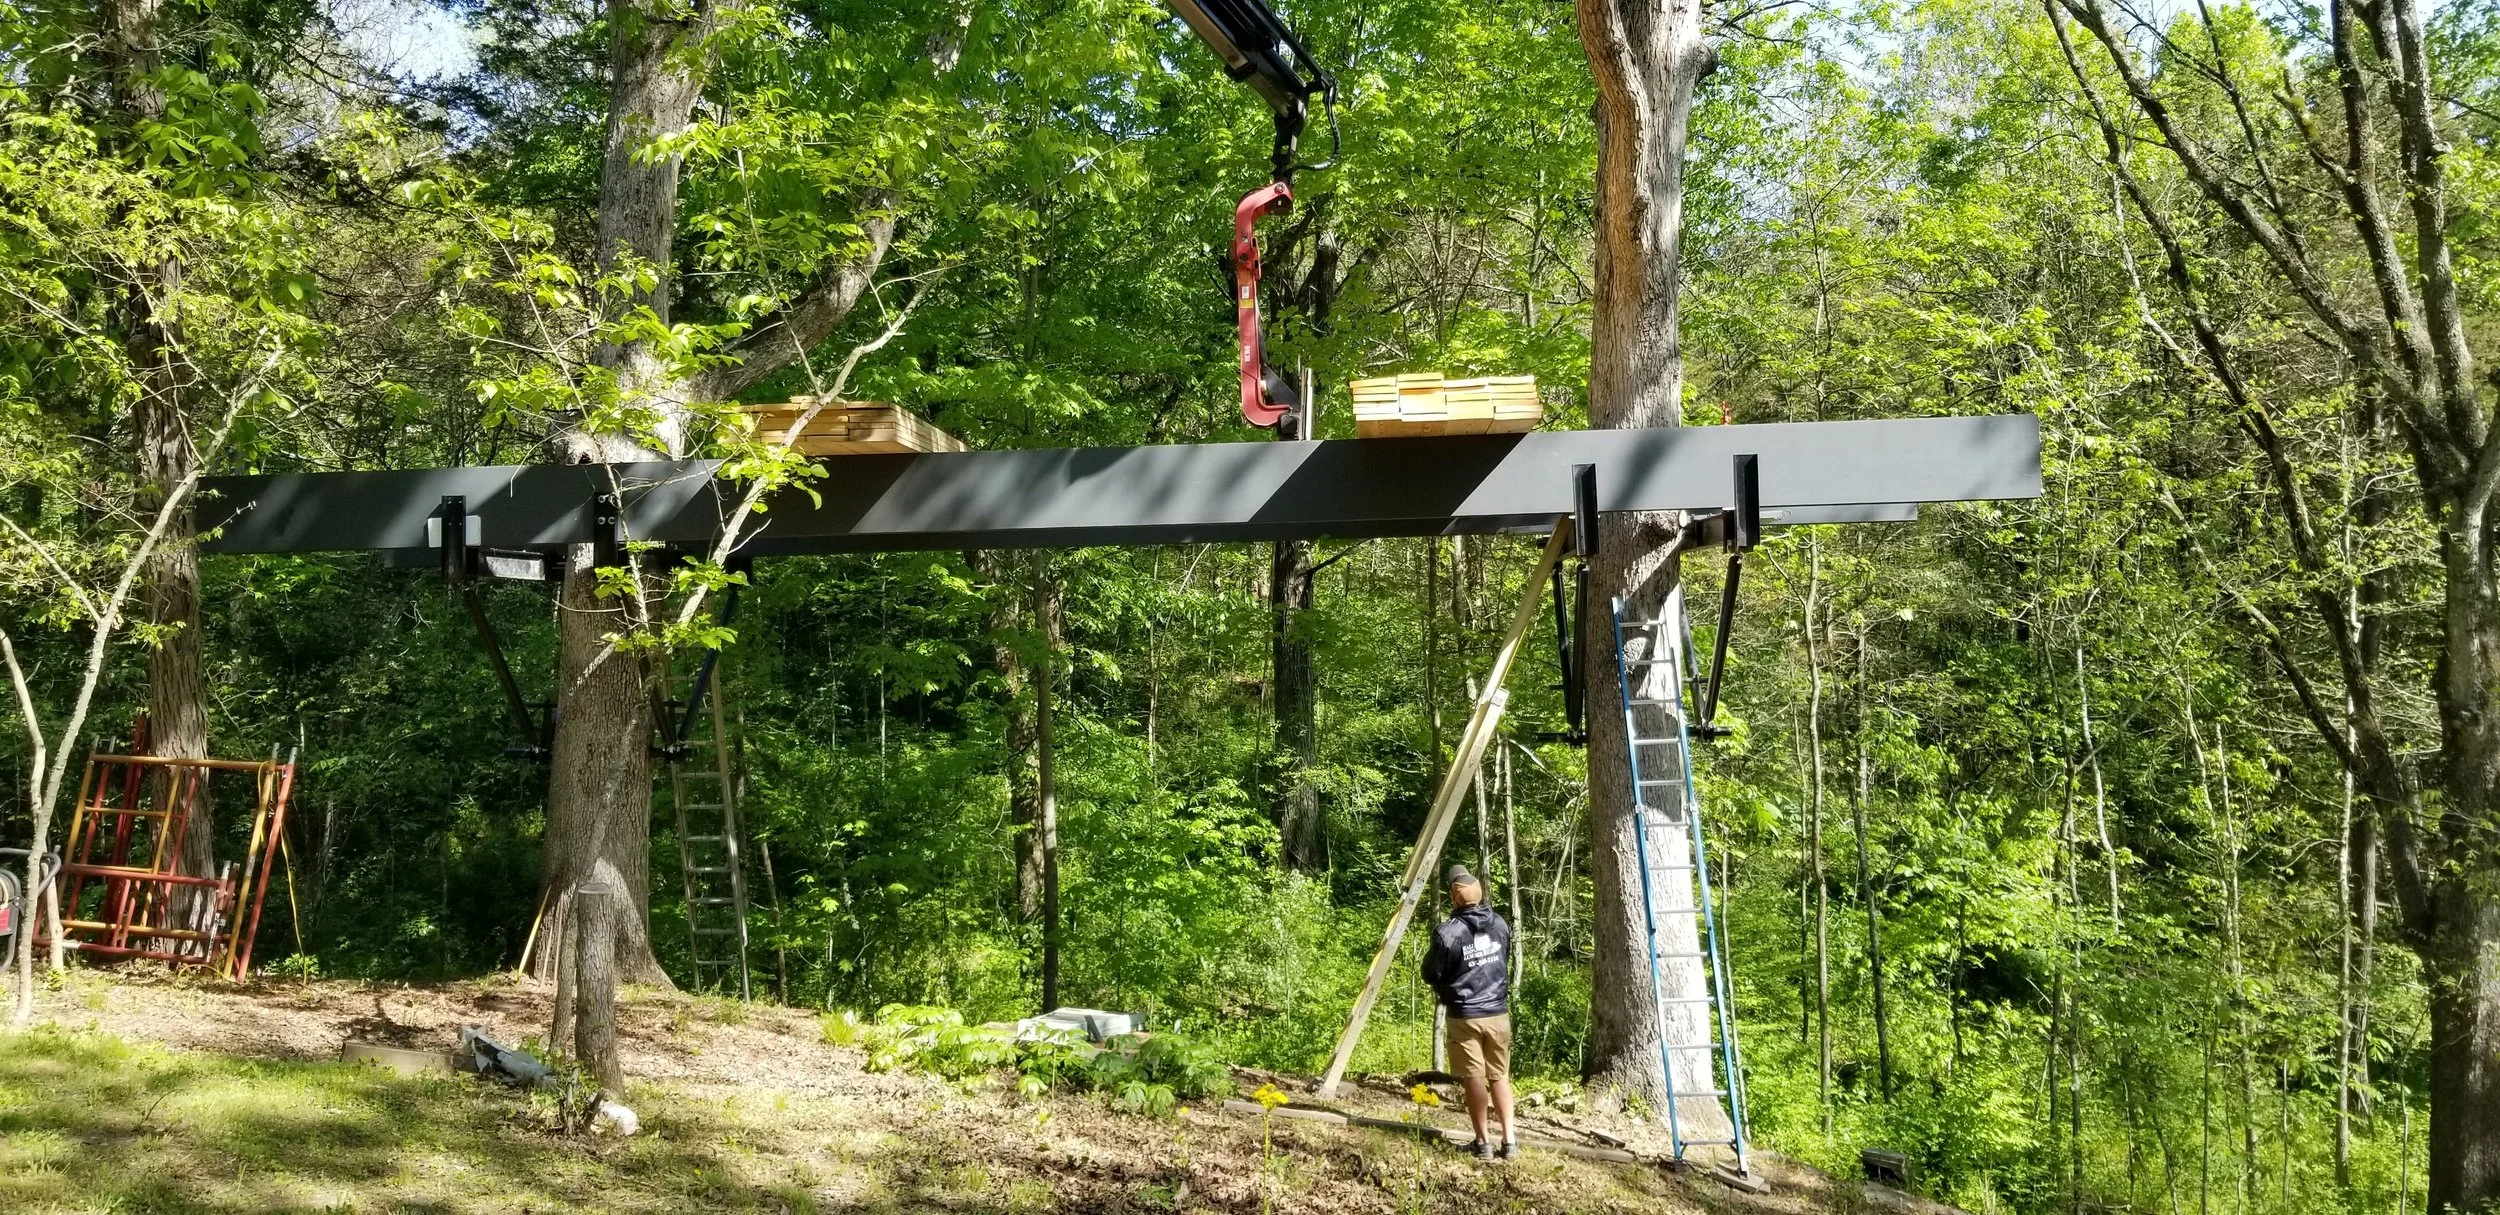
3. Building the Platform
How do you secure a treehouse to a tree?
Use Strong Bolts: Treehouse Attachment Bolts (TABs) Developed and presented to the Oregon Treehouse Conference in 1997. Each TAB acts as an artificial tree limb and can support up to 10,000lbs. Uplift Arrestors( static and dynamic) in combination with TABS allows for tree growth and movement without sacrificing the integrity of the structure or harming the trees. Charles Greenwood, P.E. has been a treehouse engineer for approximately 30 plus years. He is in his 4th generation of TAB design. It is with great honor he is our engineer and friend at Enchanted Forest Treehouse.
Floating Brackets: These allow the tree to move side to side without causing damage.
Solid Base: Use 16-inch joist spacing for a strong platform.
Extra Support: . Uplift Arrestors. Dynamic Triangle - K-nut and Cable. Knee Braces. Paddle TAB. The Yoke. Are all engineered platform design hardware that adds to the support of the platform and determines the amount of weight it can support. They allow movement and growth of the tree. Shear walls and additional framing supports can also be used if needed. Using a single tree verses a multiple tree selection for the platform requires different TABs and engineering. The treehouse engineers are the best resource to create a plan.
Check the Weight: Each type of tree, each type of support and overall expanse will determine the size and weight restrictions. Snow loads must be assessed and considered.
Use Weather-Resistant Screws: Galvanized fasteners prevent rust and wear. Don’t use nails. Hurricane braces and metal fasteners are used to strengthen the build and reduce the effects of the constant movement of the structure.


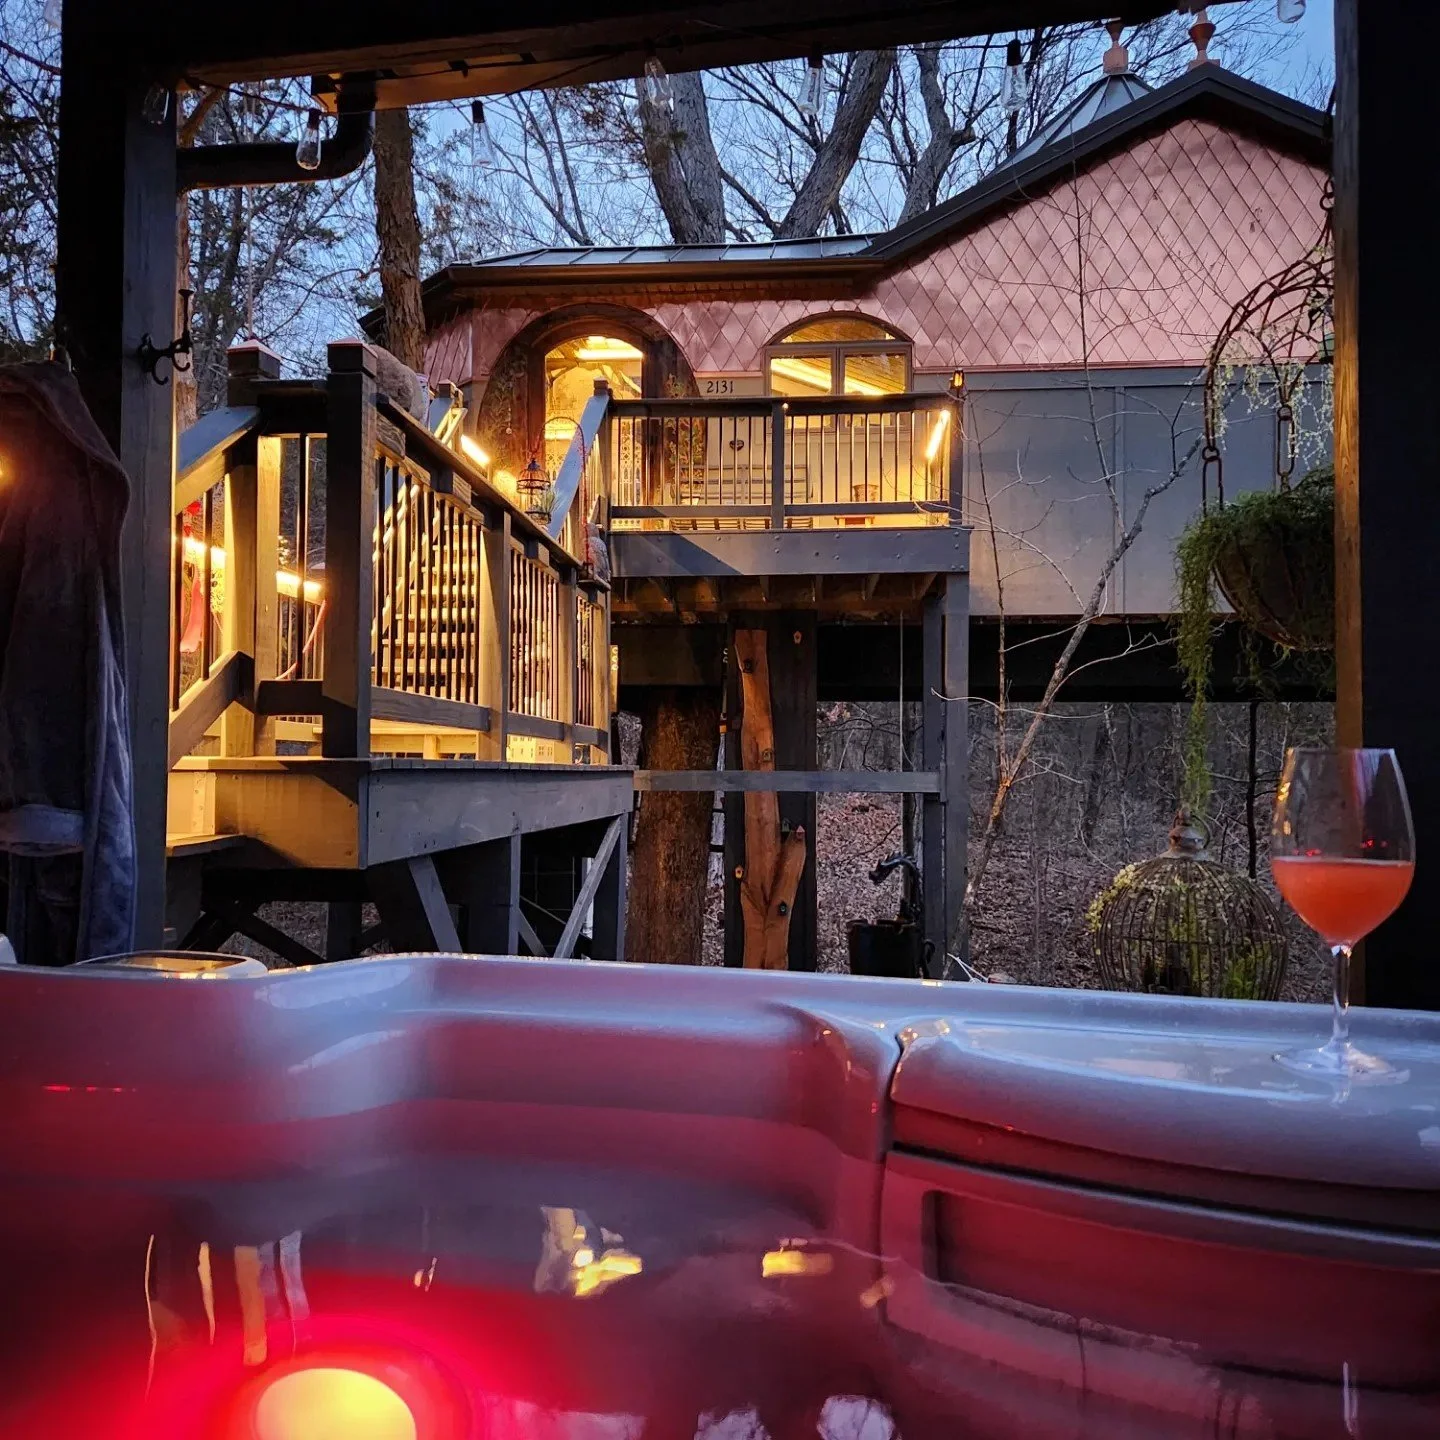
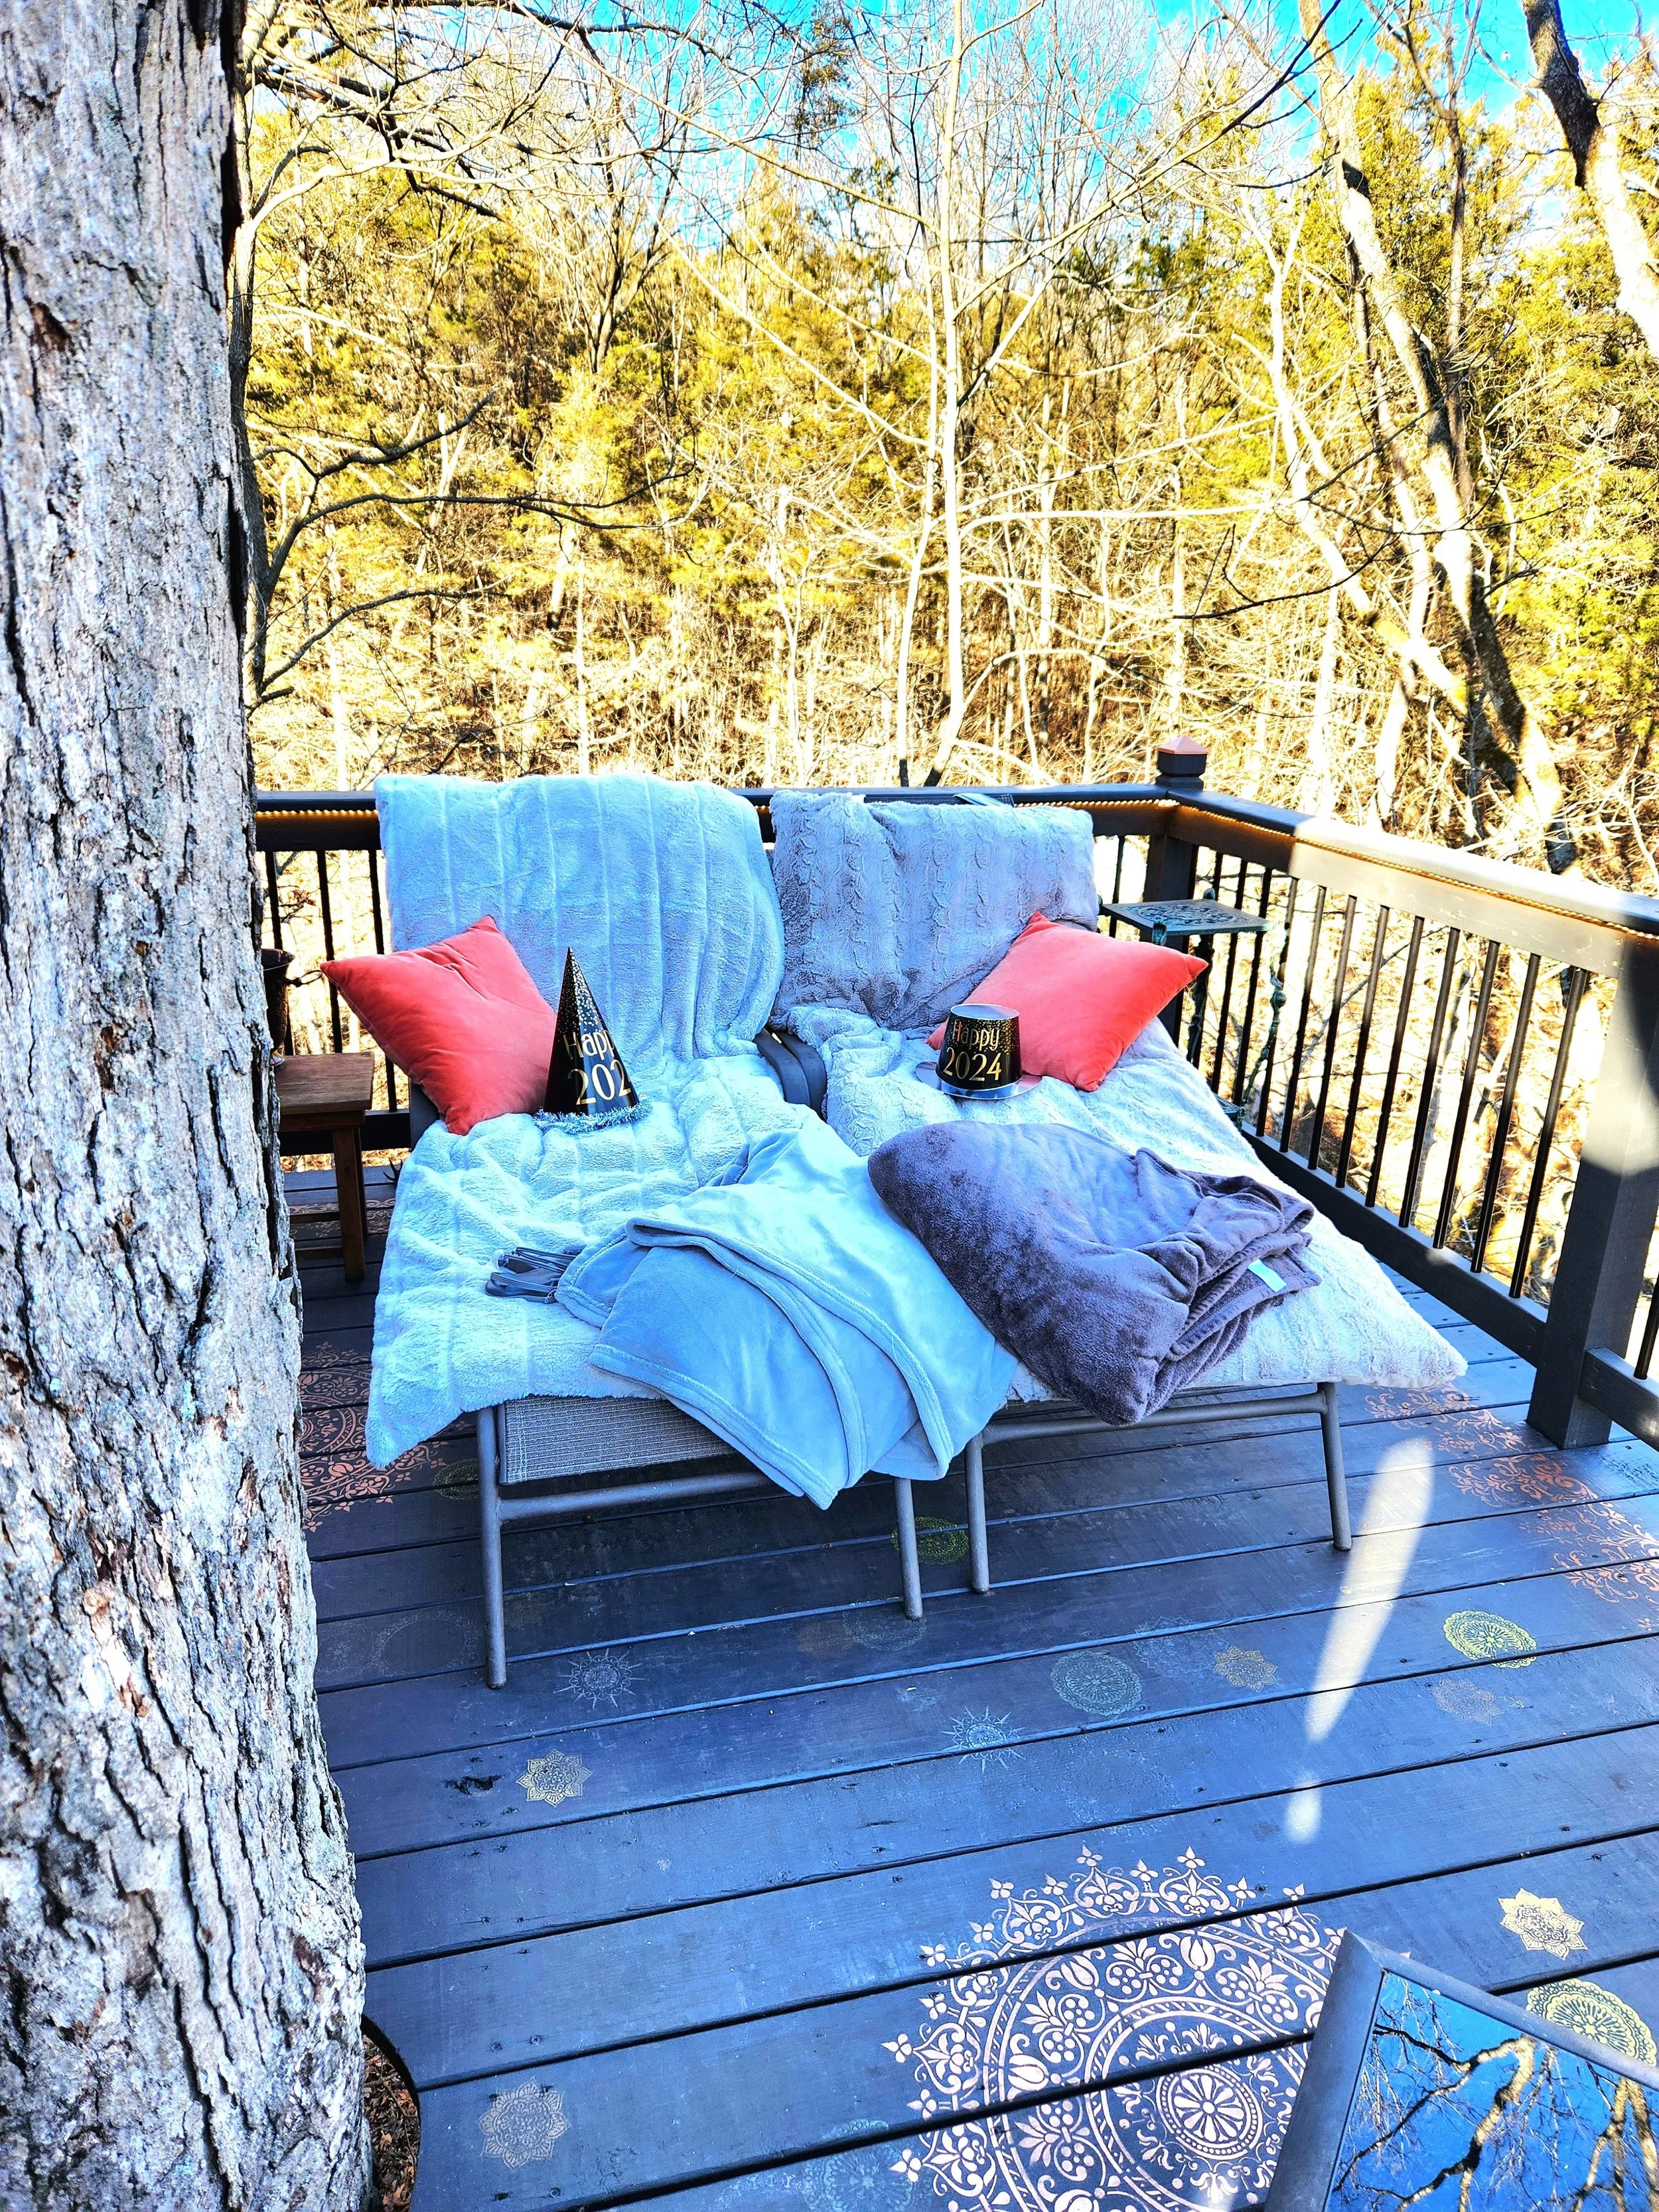
Adding a small deck or balcony can enhance the usability of your treehouse. A well-built deck provides an excellent space for enjoying morning coffee, stargazing, or simply appreciating the natural surroundings. Ensure that the deck is properly supported with additional beams and brackets to handle weight safely. A sturdy vertical railing should also be installed to prevent falls while maintaining an open and inviting atmosphere. Horizontal railing invides climbers and falling risks. Enchanted Forest Treehouse has 3 treetop decks!
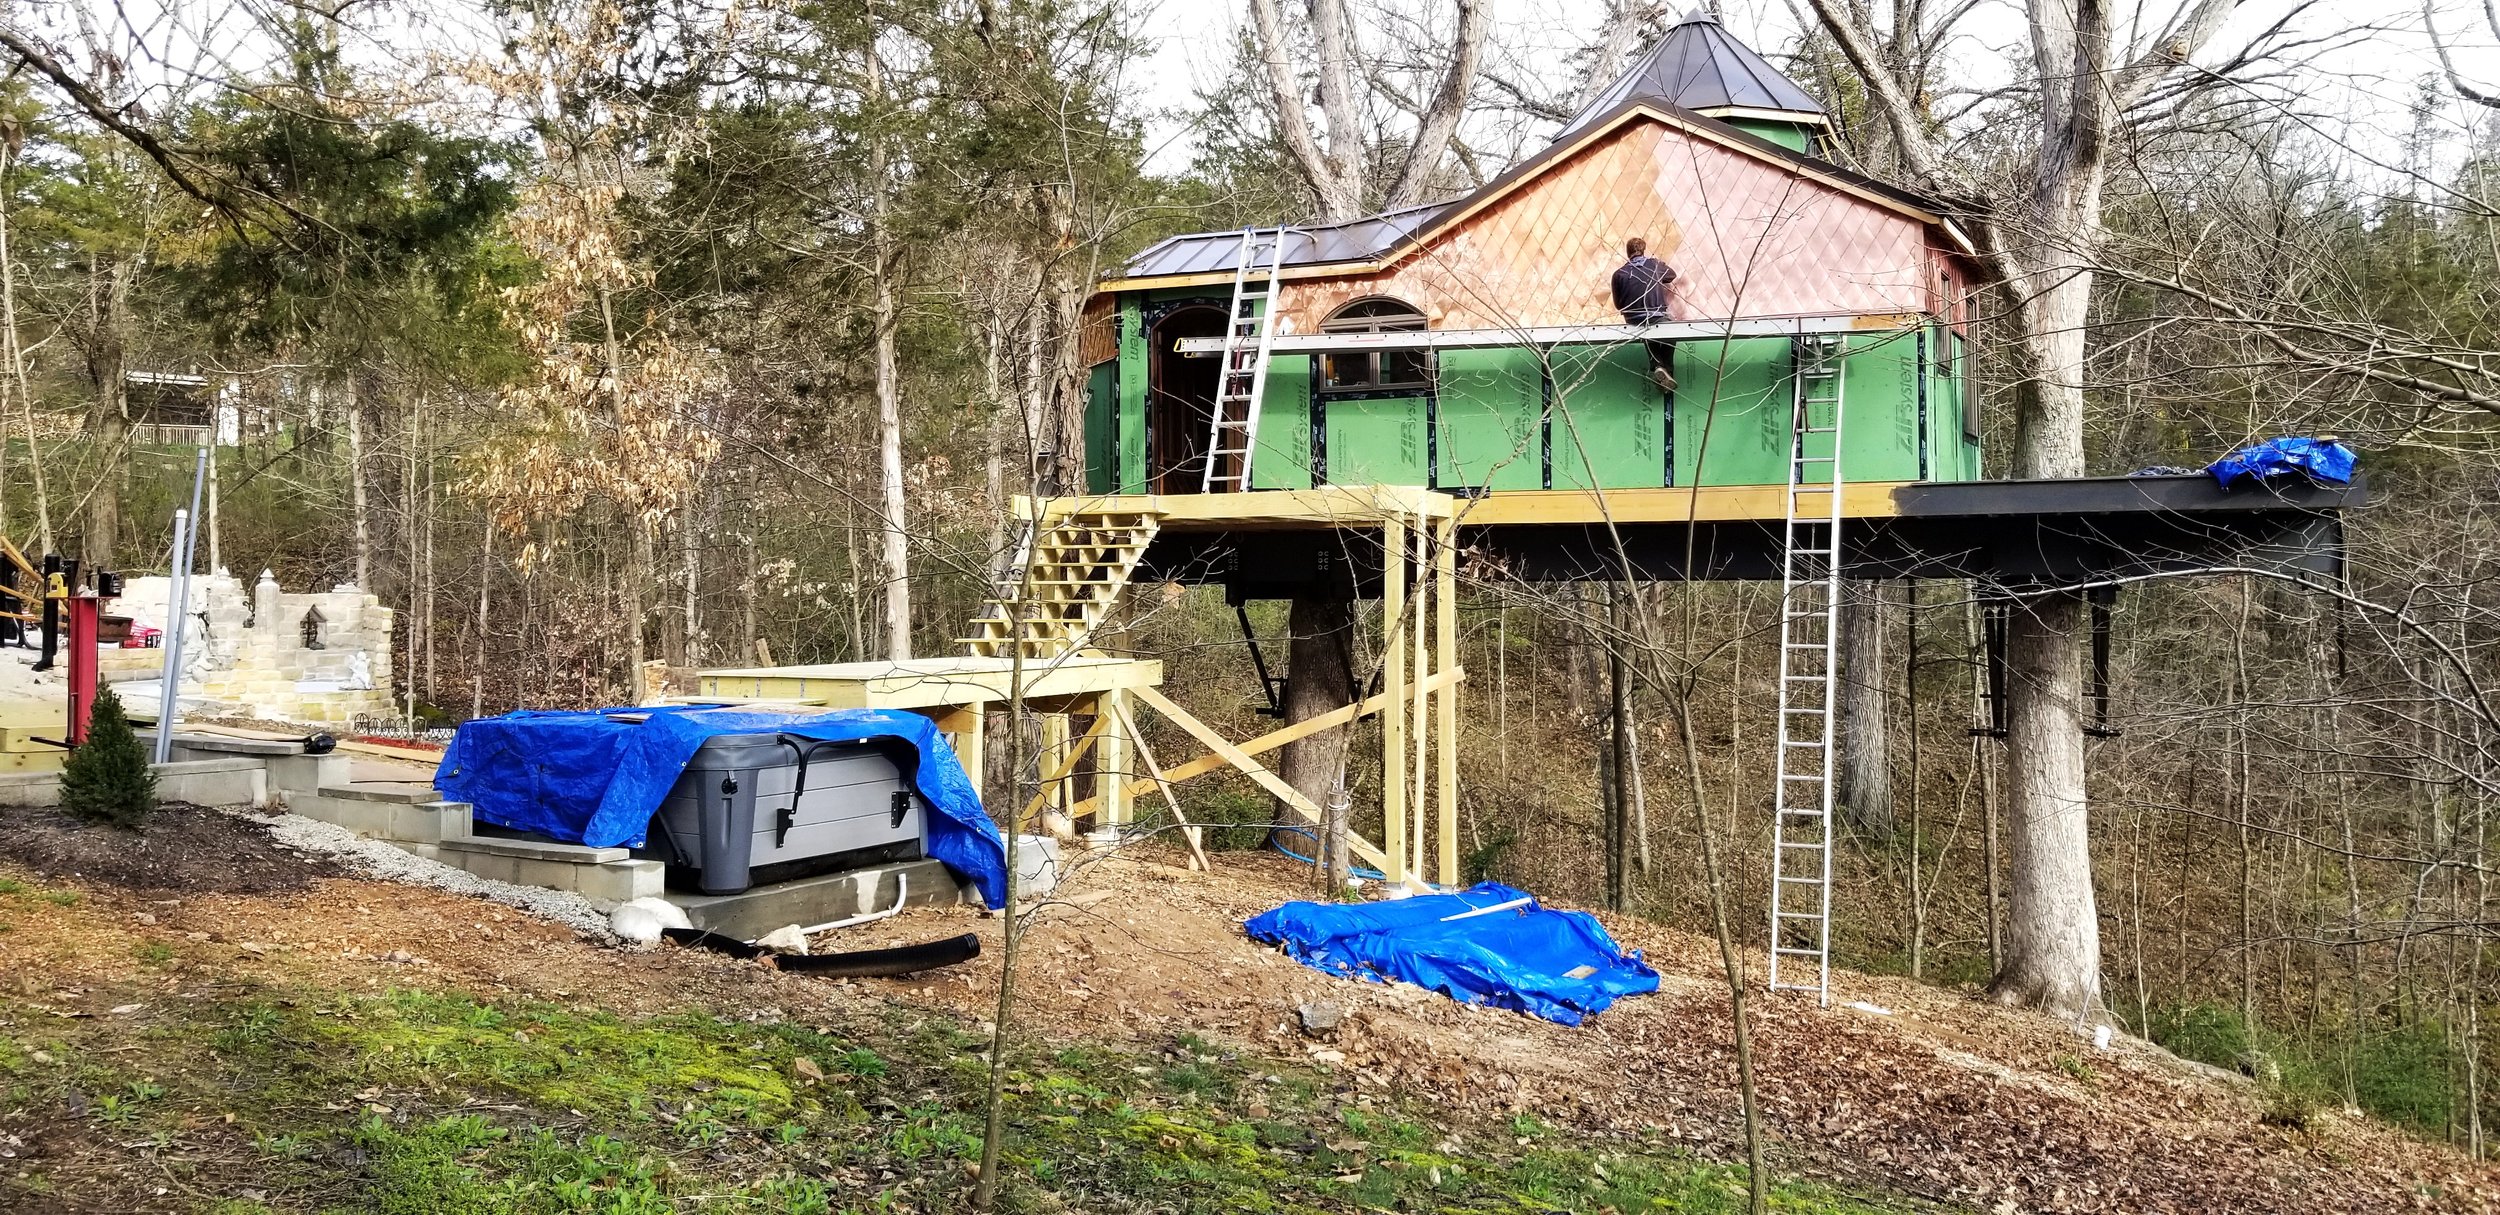
4. Building the Walls and Roof
What is the best way to build treehouse walls?
Frame the Walls First: Use 2x4 studs and leave openings for windows and doors. Lumber and building supplies are delivered by boom trucks to ease the supply that must be carried up by hand on ladders. Lumber companies have project managers that will assist in scheduling deliveries and supplies.
Use Light Materials: Plywood and cedar are strong but not too heavy. Drywall is too heavy and plaster taped joints will not withstand the movement of the structure. Car siding, paneling, or lightweight wood is preferable to use on interior walls. Spray foam insulation is prefered due to weight. Tile can be used in small amounts, if extra structural framing is reinforced to minimize the stress on the grout lines. As well, epoxy based grout will allow flexibility. LVP tile are a great light weight option as well.
Add Braces: Cross-bracing makes the structure stronger and shear walls are necessary in some designs. Double frame exterior walls for water lines.
Seal Against Weather: Use non-toxic sealants and insulation to keep the structure protected. Siding that is pre painted to last 30 years or more is ideal. Refinishing or repainting siding is difficult, hanging outside a treehouse requires scaffolding or climbing ropes. keep decking stained to prevent rot and prevent replacement costs. LVP tiles are water resistant too.
Prevent Moisture Damage: Not having a roof with a tree coming through it is my first recommendation. Play house are the only exception that allow the elements inside. Build around the tree and large branches. A vapor barrier, such as the Zip product line, and spray foam insulation helps with the waterproofing and reinforces the walls without adding too much weight. Metal roofing is prefered due to weight and longevity. Gutters can control rain run off, and divert the water from the platform. The building structure will keep rain water from reaching the ground under it. Collecting the rain water and using it to water the trees is necessary because the structure will prevent the rain from getting to the feeder roots underneath it. Enclosing the bottom of the building under the joist help with temperature extremes, moisture, and insects inside the building.


5. Safety and Accessibility
How do you make a treehouse safe? Building codes.
Install Railings: They should be at least 36 inches high.
Stairs: Install handrails and anti slip rugs
Safe walkways: Mulch, rubber mats, or pavers can create a level pathway.
Have an Exit Plan: A second way out, like a rope ladder, is a good idea.
Avoid Lightning Risks: Don’t build on the tallest tree in the area.


6. Decorating and Finishing Touches
How do you decorate a treehouse? Depends on the treehouse’s purpose. Kids playhouse verses a luxury resort.
Playhouse: Luxury Resort:
Furniture: Use lightweight options like bean bags and foldable chairs. Custom designed hand made wooden furniture from wood cut on site.
Lighting: Outdoor and indoor lights add a warm glow. Dimmable switches, outdoor deck lights, crystal chandeliers, antique lamps, fairy lights, lighted book nooks, up lighting on ceiling.
Weatherproofing: Insulate the walls if you plan to use it year-round. Hand made copper dragon scale tiles, batten board siding, foam insulation, standing metal roof, custom glass carved door.
Flooring: Bamboo, cork, or laminate are stylish and practical. LVP tiles
Storage: Floating shelves and foldable furniture save space. Custom cabinets, live edge shelving, Custom vanity, antique dressing table, hand carved log tables.
Personal Touches: Add curtains, artwork, or a small desk to make it feel like home. Hand forged metal dragon table, willow stick table, hand carved burls, antique wood trim, crystal curtains, custom pottery.
Fun Themes: Try a rustic cabin, adventure hideout, or fairy-tale look. Interactive art display with a fairytale theme. Double person slipper tub, Narnia wardrobe, hand painted mermaid mural bathroom.


7. Eco-Friendly Building Tips
🌿 How can you make a treehouse more eco-friendly?
Use the wood from your build site .We hired a portable sawmill and used the lumber to build our furniture and decor. Stone from the site was used to build a retaining wall and parking area.
Collect rainwater for the trees and plants. Gutters are a great way to collect the rain water and redirect via an irrigation system. Soil and water analysis is helpful in determining the schedule for deep root feedings, vascular flushings, and disease preventive spraying.
Pick non-toxic paints and finishes.and safe sealants. Don’t poison the trees!
Go green! Plant trees and a garden. Each state has a conservation office and they give away native trees. Arbor day is celebrated with the planting of new trees in our forest! Recycle trash.
Native Landscaping: Plant local species around the treehouse. companion planting and landscaping make an impact!
Energy Efficiency: Use LED lights and battery-powered devices to save energy. Unplug!
Shinrin-yoku: Take a forest bathing class .Japanese form of healthcare to combat stress, insomnia, depression, anxiety, fatigue, and anger.
Massage Have a massage on a treetop deck!
Reiki - Balance in life and in nature!


Final Thoughts:
Start Your Treehouse Adventure Today
Building a treehouse is a fun and fulfilling project. It can also challenge you! It can be a peaceful retreat, a backyard escape, or even a luxury rental. The key is stability, safety, and sustainability. Protect the trees! Do your research and Plan out all of the details. Hire competent subcontractors and treehouse engineers! In the end sit back in the branches and enjoy treetop living!
Visit Enchanted Forest Treehouse and we can help guide you!
And give you a taste of luxury treehouse living in an Enchanted Forest!
🛠️ Maintenance Tip: Check your treehouse often for wear. Maintain healthy trees and hire an arborist!
enchantedforesttreehouse.com / owner : marsha@enchantedforesttreehouse.com / 636 221-2463 / Follow us on Instagram and Facebook
If you're looking for inspiration, the Enchanted Forest Treehouse is a breathtaking example of handcrafted design and luxury in the treetops. Featuring custom woodwork, a cozy atmosphere, and stunning views, it's the perfect getaway for those who appreciate unique architecture. Want to see how it was built? Visit The Build Page for a behind-the-scenes look, or Book a Stay to experience the magic firsthand!
🔨 Start your treehouse project today!